
This site contains affiliate links. As an Amazon Associate, I earn a commission from qualifying purchases at no extra cost to you. Full Disclosure Here.
No matter how many times I write about food, there is always something new to consider or a new and different way to present the same old information in a more useful manner. With that in mind, today I would like to share a method for getting started with your long-term food storage program in an easy, step by step, and cost-effective manner.
To be truthful, my initial goal with this article was to respond to readers who were just getting started and wanted a long term food storage list they could use to plan out their grocery shopping a little more easily. I also wanted to compile a checklist that more experienced preppers could use to compare what they had to what they needed. My goal can pretty much be summed up by saying that I wanted to write about getting started with long term food storage the easy way. No frills, no fluff – just a common sense list of food items to get you started.
With that goal in mind, let me say this: this is not a list of items intended for deep storage. Nor is it a list of items packaged so that they have a 25-year shelf life. (And in reality, do you really need your stored food to last that long?) I am also not going to list items that might be foreign to your palate, difficult to find, or too costly to absorb into your weekly shopping budget. This list is for those that want to get started with long term food storage without spending a fortune.
What you are going to get is a list of 20 items that can easily be purchased at your local grocery store, warehouse club and surprisingly, even online at Amazon. They can be purchased in one shot, all at once, or you can pick up one item from the list each week over a period of twenty weeks. The choice is yours. All I ask is that you consider getting each of the items on the list and that you also consider getting started sooner rather than later. I promise you that this will be easy.
I am going to include quantities that require no extra thought, no calculator, and no formula for determining servings or overall quantities. Like I said. This is going to be EASY!
DIY Long Term Food Supply vs Pre-Built Long Term Food Storage Packages
Before jumping into the full “DIY” list, it’s worth mentioning that there are many reputable prepper food companies out there offering starter kits. Which begs the question, which option should you go with?
- If you have time to build a food supply: The 20 items in the next section are perfect end goals.
- If you need to quickly build a base supply: The following food storage supply kits are great to start with.
Emergency Food Starter Kits
These are the top options that are BDS approved and tested:
- Mountain House “Just in Case” 14-Day Food Supply: You can save 20% off your order with code MHAFFILIATE20 at checkout here.
- Valley Food Storage 1-Month Supply: Currently on sale at this listing here. You can use promo code “BDS” for an ADDITIONAL 10% OFF at checkout (off your entire order).
20 ITEMS TO KICK START YOUR LONG TERM FOOD STORAGE PLAN
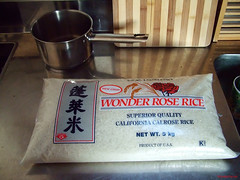
1. 20 pounds of Rice. As boring as it may sound, rice is one of the backbones of every food storage plan. It is filling, nutritious, and with the use of varied seasonings and condiments, highly adaptable in a variety of tasty meals. The choice of white, brown, or a combination of the two is up to you. White rice has a longer shelf life but brown rice has more nutritional benefits. In my own household, I like to combine the two along with some Jasmine, Basmati and Calrose sticky rice. NOTE: Be sure to check out our recent guide on how to remove arsenic from rice.
2. 20 pounds of Pinto Beans. Like rice, beans are the backbone to every food storage plan. You may substitute white, kidney or other types of dried beans but honestly, pintos are one of the least expensive dried beans and in my opinion, one of the tastiest. Need help cooking beans? when you are done here be sure to read Survival Woman Learns to Cook Dried Beans and you should too and Respect for the Lowly Pinto Bean.
3. 20 cans of Vegetables. Green beans, peas, corn, and canned tomatoes are good choices. Let your taste and budget guide you. Buy what you currently eat and enjoy.
4. 20 cans of Fruit. Peaches, pears, pineapple, fruit cocktail – again, this is your choice. Fruits add a nice sweetness to life and these days we all could use more of that.
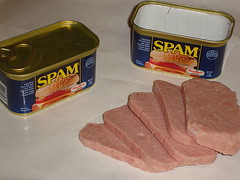
5. 20 cans of Meat. Chicken, tuna, shrimp, salmon, Vienna sausages, beef stew, and yes, even the ubiquitous Spam will satisfy this requirement. Did you know that you can even purchase canned roast beef? Again, let your taste and budget guide you – there are lots of canned meat products to choose from. UPDATE: If you are looking for some long-lasting but all-natural, non-GMO canned meats, check out Wertz’s meats here. You can also read our recent hands-on review.
6. 4 pounds Oats. Remember when you were little and Mom warmed your tummy with a nice comforting bowl of oatmeal? That is what we are talking about here. A bowl of oatmeal topped with canned fruit can be enjoyed for breakfast, lunch, or dinner.
7. 2 large jars of Peanut Butter. Peanut butter is an excellent source of protein, with plenty of calories for energy and sustenance. Besides, who can resist the taste of a gooey spoonful of luscious peanut butter? While the long term shelf life of peanut butter is not as great as some would like, it is excellent for emergency food storage on a one-year timeline. So if you buy peanut butter, just make sure to use your oldest first and rotate it out and you will be good to go.
8. 2 large jars of Tang or other powdered drink mix. The only requirement here is get something you like and something fortified with Vitamin C. I am not going to preach and tell you to avoid artificial sweeteners. If Crystal Lite works for you in normal times, go for it.
9. 5 pounds of Powdered Milk. Powdered milk is a great source of protein and other nutrients. In addition it is filling and can be used to top your oatmeal cereal or stirred into your coffee as a flavor enhancer.
10. 5 pounds of Salt. It goes without saying that salt is essential for survival plus it has a lot of uses other than as an enhancement for food. That said, our bodies need salt to survive. Read more about salt in the article Reasons You Need Salt in the Prepper Pantry.
11. 10 pounds of Pancake Mix. An all in one pancake mix (such as Krusteaz) only requires the addition of water to make up a batch of batter. As with oatmeal, a big plate of pancakes, perhaps with some honey or jam, will make a satisfying meal that can be eaten for breakfast, lunch or dinner.
12. 2 pounds of Honey and 2 large jars of Jam. We all need some sweetness in our life, even with Mother Nature or life deals us a blow. I choose honey and jam over sugar but at the end of the day, you can make a substitution or simply mix and match.
13. 10 pounds of Pasta. Pasta is familiar and easy to fix. Pasta is a dense form of wheat but so much easier to deal with when you are first starting out. Besides, it is a fabulous comfort food.
14. 10 cans or jars of Spaghetti Sauce. Cheap yet satisfying, canned pasta sauce on a bed of pasta creates a satisfying meal that can be put together in minutes.
15. 20 cans of Soup or Broth. The beauty of canned soups and canned broth is that they are a budget friendly. Soups are an all-in-one meal solution. All you need is a can opener and a spoon and you have a meal ready to go. For an extra satisfying meal, try using a can of soup as part of the cooking water for your rice. Yummy! For a guide to making your own bone broth, see Donna’s guide here.
16. One large jug of Oil. Choose olive oil, coconut oil or some other cooking oil, but definitely get some. Oil is essential for good health, fueling our energy stores, and providing support for fat-soluble vitamins and nutrients as they work their way through our system. Not only that, but a bit of fat in your diet adds flavor and makes you feel satisfied when you are done eating.
17. Spices and Condiments. Adding some spices and condiments to your food storage pantry will allow you to vary the taste of your storage foods, thus mitigating some of the boredom that is likely to occur over time. The exact mix of spices and condiments is up to you but some suggestions include garlic, chili, Tabasco (hot sauce), salsa, oregano, thyme and black pepper. For a full list of the best prepper herbs and spices, check out the BDS guide here.
18. 5 pounds of Coffee or 100 Tea Bags. There are those that will say that life without coffee is not life at all. Whole bean (assuming you have a hand grinder), ground or instant – take your choice. Or substitute tea. Green tea and many herbal teas are quite therapeutic so if you like tea, this may be a good way to go. To learn more about bulk coffee processing and storing for preppers, read this guide here.
19. 2 large bags of Hard Candies. Hard candy can go a long way toward making an unpleasant situation bearable. Butterscotch drops, peppermints and even lemon drops are good. Have fun with this and pick up a couple of bags of your favorites!
20. Mini LED Flashlight and Extra Batteries. Okay, this is a cheater item. It is not food but it is all important and so it will not hurt to stash a miniature flashlight or two along with the edibles in your food storage pantry. My top pick of the moment is the Blocklite. This thing just goes and goes and goes plus, it does not take up any storage space.

BUT THERE IS NO WHEAT AND NO FLOUR ON THIS LIST!
So you noticed!
There are no wheat berries or other whole grains (other than oats/oatmeal) on this list and there is also no flour. While there is a place for these items in a long term storage plan, I consider them part of the second phase of food storage.
The truth is that many preppers would not have a clue as to what to do with wheat, so why push the envelope?
The same goes with flour. To make flour usable, you also need yeast and baking powder plus the skill and know-how to bake. Not only that, you most likely will need an outdoor oven of sorts – especially if the grid is down post-disaster. That, and more, will come later, but for now, while covering the basics, it is much simpler and far more practical to stick with easy to cook foods that can be combined into interesting meals without the need for much experience other than opening a can or a package.
Too Much Work?
If this all seems like too much effort OR you need some immediate food security, be sure to check out our top survival food brands here.
10 Crazy Simple Strategies for Building an Emergency Food Supply
1. Take Your Time and Go Slow
If I can cite the number one reason people become overwhelmed when even thinking about putting aside an emergency food supply, it is the perceived sense of urgency that it all needs to be done right now. And this, for many, results in complacency and inaction. Don’t fall into this trap. Begin with a three day supply and gradually build that up to a week. After that, add to your emergency food supply week by week until pretty soon, you have three months of food stored away for you and your family.
Remember, it is perfectly okay to start out by picking up just 2 or 3 extra cans of meats, fruits or vegetables during your weekly trip to the supermarket. Do what you can at a pace that your are comfortable with and ignore any message you get from others (including prepping forums and websites) to do it all at once.
2. Spend Your Money Wisely
There is no reason to break the budget while building an emergency food supply. Before heading out to the supermarket, view local ads and find specials that will allow you to purchase more for less. If you are so inclined, use coupons and if allowed, shop on “double coupon” days.
Warehouse clubs such as Costco have coupons too so don’t overlook those booklets that are sent out monthly. Often times the savings are huge. If you do not belong to a warehouse club, perhaps you can tag along with a friend or call ahead and see if they will give you a one-day shopping pass.
Consider shopping at one of the many Dollar Stores or even in the back aisles of the drugstore. Bargains abound as I recently learned when I picked up a dozens of name-brand canned vegetables for fifty cents a can.
While freeze-dried or dehydrated foods are often on prepper food lists, they are expensive and often have to be special ordered or at least purchased at specialty food stores. They often taste really good and you may want to eventually add some to your supply of food, but in the beginning, it may be best to stick to more budget friendly items. Augason Farm is a good source of dehydrated foods that won’t break your budget. They are usually easy to find on Amazon or at Wal-Mart and you can add a #10 can at a time as your budget allows.
At the same time, be sure to have some comfort foods on hand as well. Comfort foods can help keep morale high during and emergency situation.
3. Scope Out and Optimize Your Storage Space
Finding space to store your emergency food supply can be a challenge, especially if you live in a small home or apartment. Get creative, starting with a walk around tour of your living spaces. Locations often overlooked are under beds, way up high in closets where you can add another shelf, and under dressers, desks and sofas.
My number one tip, though, is to go through your cupboards and closets and remove those items that are duplicates, that you rarely use, or that you do not use at all. For example, in your kitchen, how may different pots and pans do you need? My guess is that you use the same two or three over and over again. Stow the extras in the basement, attic, or garage, or give them away to charity. Trust me, they will not be missed. The same thing applies to seldom used clothing, shoes and sports equipment.
If you are truly serious about finding the space for your emergency food supply, you will toss those miscellaneous odd-ball items that are only used once every three years. This alone will free up space for some additional canned or dried food items.
4. Stick to the Basics
Monitor what your family eats for a week and use that as a guideline for getting started. The advantage of doing this is you will learn what your family likes so that you can shop accordingly. You would be surprised at how many people can’t remember what they ate yesterday let alone a week ago. Try to write everything down so that you don’t have to rely upon your memory.
Keep in mind that bulk foods such as beans, rice, oatmeal and powdered milk are staples in the survival food pantry. Relatively speaking, they are all (with the exception, perhaps of the milk) inexpensive. These are basics, yes, but if you are just getting started, why not begin with the food your family eats – but only in canned form?
Also, do not forget to store at least one gallon of water per person per day along with your emergency food supply. More is better.
5. Don’t Make it a Chore
Storing food for an emergency can be challenging but it does not have to be a chore. Eliminate the panic of attempting to get it all done at once and the process can almost be fun and game-like. Searching out deals – either with coupons or at sales – can be an adventure in and of itself. Involve the kids by asking them for suggestions and helping them make selections that they will enjoy eating.
Continue the adventure by learning to cook with traditional storage items such as the bulk food items mentioned above (beans, rice, oatmeal and powdered milk). Adding condiments of various types will result in delicious meals not only now, but after an emergency when good tasting food will be a comfort.
6. Be Mindful of Food Storage Conditions
Notwithstanding finding space for your emergency food supply, consider the storage conditions in your home. The enemies of food storage are temperature, moisture, oxygen, light, pests and time. Then there is the two legged variety (such as teenagers!) who eat everything in sight, including your emergency food.
Remember that what you are looking for is a cool, dry place, for most food storage. The right conditions will improve the storage life of all your food.
While not all household conditions are perfect, be aware of the six enemies of food storage and do your best to mitigate their effect on your precious food supply. This means you should avoid storing food in garages that are 90 degrees in summer and 30 degrees in winter. I am repeating what I said before but it is important: empty your cupboards and closets of excess stuff and stow these items in the basement, attic, or garage. This will make room for you to store your food inside your main living area where the ambient room temperature is stable.
7. Learn From Your Mistakes
Everyone makes mistakes when it comes to food storage and trust me, I have made my share of them. One mistake I have made is to not take my own advice and stock up on something I truly dislike. Another is to stock up on sugary drinks in #10 tins from a well-known food storage company. What was I thinking?
You know your own eating habits the best but lest you think you are infallible, review these 15 Common Food Storage Mistakes.
8. Rotate Out and Replenish In But Only Within Reason
If there has been a major shift in my food storage thinking over the years, this is it. I used to believe that nothing lasts forever and recommended periodically going through your emergency food supply to rotate out the oldest items.
These days, I still recommend rotating but not to the point where you make it your career. I have read enough studies and have eaten enough ten year old food to know that if the packaging is in good shape, meaning well sealed, no dents, rust or leak in cans, the food is most likely okay to eat.
Additional Reading: What You Need to Know About Eating Expired Food
I say most likely because all stored food must pass the sniff test. If it smells bad, do not pass go. Throw it away.
Of course food that is packaged for long term storage, either by the manufacturer or yourself, is going to be fresher in look and taste. Presumably, there will also be less leaching of nutritional value.
Food storage containers include mylar bags, vacuum seal bags, and buckets. Oxygen and moisture absorbers can help extend the life of your food. When deciding what storage containers to use, consider how long you intend to keep the food sealed. Some people like to think on a 10 year time line while others want some food items to be shelf stable for 25 years if possible. An oxygen absorber are a must for mylar but not for vacuum sealing.
How to package for the long term is beyond the scope of this article but you will find plenty of tips in the following three articles here on Backdoor Survival:
Survival Basics: What the Heck are Oxygen Absorbers?
Survival Basics: Using Mylar Bags for Food Storage
Survival Basics: Buckets, Lids and Gamma Seals
9. Keep Track of Your Stuff
Once you get going, it will be easy to lose track of what you already have. The best way to overcome the state of confusion you will experience six months down the road is to start keeping track of your stored items now – from the beginning. Use a spiral notebook, a computer spreadsheet, or a clipboard and a pad of paper. Update your inventory with the item and date of purchase as it goes into storage and of course, mark it off as it rotates out.
Another good idea is to use a sharpie or a colored label to mark the purchase date on each item. That is the crazy, simple way of using the FIFO method of food rotation (FIFO = First In, First Out).
Note: Just because you are not going to be paranoid about food rotation does not mean you should ignore the wisdom of using your oldest items first.
10. Do Your Homework
Resources abound. With a modest amount of computer knowledge, you can Google around the internet to find all sorts of emergency food and food storage advice. Be an informed consumer. Learn about the foods that store well and also about pre-packaged meals that only require a bit of hot water to create a good-tasting and satisfying food experience.
Learn about bulk foods and cooking methods that your can use when there is no power to your home. Many of the websites selling food will have blogs as well as links to helpful information. Why not use them to increase your overall knowledge and become familiar with additional tactics and strategies for storing food for the long term in a hassle free manner?
Also Read: Food Storage Ideas for Preppers
~~~~~~~~~~~~~~~~~~~~
THE FINAL WORD
As you read through this list, I hope you can visualize the number and variety of meals that can be made by mixing and matching the items listed in the kick-start plan. How about some rice, salsa, and canned chicken cooked into a casserole in your cast iron skillet? Or pancakes topped with canned peaches and honey? Then there are pinto beans, combined with rice and corn, and topped with a bit of Tabasco for a fiesta-style meal.
Well okay, perhaps these are not gourmet delights but with the added condiments, they will taste good and be as healthy as you can expect food to be when fresh meats and produce or unavailable.
Is this a complete list of everything you will need to be fully prepared food-wise? Heck no. Are the quantities adequate to feed a family for a month, three months or longer? Perhaps a month but not much longer. Truthfully, for long term storage you need more food and more variety (read about the top survival food brands here) as well as some packaging methods (Mylar bags or buckets plus oxygen absorbers) to insure that your will food stay viable and pest free for years to come.
But for now we are more focused on either getting started our rounding out our basic survival pantry. And for that, these 20 items will do just fine.
Enjoy your next adventure through common sense and thoughtful preparation!
Gaye


95 Responses to “20 Items to Kick Start Your Long Term Food Storage Plan”
No flour/wheat because you need yeast, etc? Not completely true. If you have access to clean water (or milk/yoghurt), you can make Indian flat bread or chapattis! Once you get the hang of making them – basically adding tepid water to the flour until you can make a smooth and elastic dough, then roll it out and cook in a skillet – you can make endless variations! I often dissolve a vegetable or beef bouillon cube (you should stock those too, or instant bouillon) in the water first to add more flavor to the chapattis, but you can use any herbs you like. Getting the hang of making them might seem a little trying at first, but eventually whipping them up is just a breeze! My kids love eating them right out of the pan with a little butter spread on the still hot bread, and we often eat them together with beans, etc. Here’s a handy tutorial for those interested: //indianfood.about.com/od/breadrecipes/ig/How-to-Make-Chapatis/Making-Chapatis—Step-1.htm
Thank you, just to add something. This is a great recipe for letting out your anger or frustrations. Once you have the dough in balls. Forget that roll pin, grab your cast iron skillet (works better than a griddle which I would be already heating up for cooking) and bring that skillet down hard on that ball of dough. Have a smashing good time. 🙂
To buy beans and different similar items go to your local produce wholesaler, I live in San Antonio, and I go to the company called Produce Express , they beat Wally World hands down if you want bulk. Ask for Leo Fernandez
For those who want bread with their meals, make tortillas , their is a product called Pioneer flour tortillas mix , my wife and I tested a bag of it by storing it in a cool dark cellar for ten years, then we opened it up to test to see if it was still good, my were we surprised, we checked for bugs in the flour, NONE what so ever. Then we made ten tortillas over an iron flat plate, one that can also be used on an open fire. We cooked them up and they were great. I could not believe it, neither could my mother in law , 80 yrs old at the time she thought they were good . What I came to find out later that the same flour mill that made that brand made also an even better tasting flour tortilla mix that is ready to go by just adding water, is called White Wings flour tortilla mix .
For those living in the SouthWest, the native Indians made a flour out of Mesquite tree Beans.
When hiking chew on the raw Mesquite bean and it will give a sweet flavor like a rock candy .
i absolutely agree on this list! Most of these item hubby and I eat anyways, so they fit perfect in my grocery list. for those who dont know how to cook Beans or rice, they can begin by making a pot of soup! Beans and rice go good in soup, and believe it or not, i love spam chili over rice!! Noms!
Today while at Dollar general, i found cans of Seasoned veggies on the $1 shelf. like a can of tomatoes/okra/corn, Hoppin’ johns, red beans/rice. Make a big old pile of mashed taters, and YUMMO! for a buck in my stash!
I’ve been cooking my sunday dinners in my Dutch ovens on my back porch for several years. I do it mainly as a hobby, but it has built in me the confidence to cook (and even bake) without electricity.
Good for you! I’ve been practicing with a solar oven, mostly in the summer to keep my kitchen from overheating but I find that sometimes it’s easier than an electric oven or stove top. So now I use fairly often, with good results.
What could I use as a substitute for powdered milk? I cannot have dairy products…
Unopened milk alternatives (almond, soy, coconut milks, etc) will actually store for a year. That is according to the printed expiration dates, so they may even last longer…though I have not tested that out myself.
I haven’t looked into it yet, but I’ve wondered if large dried coconut flakes, stored properly, might last longer than a year. It is pretty easy to make coconut milk from them with water and a blender.
I would add the simple necessities to make tortillas, a great wrap for almost anything.
I always associated them only for tacos, but when living at a S TX fish and hunting camp for a few months, every night resulted in barbecued whatever wrapped in tortillas.
This is a good realistic list for those starting out. I have all of this plus in my pantry at all times, my MIL thought I was insane until we needed it an I was able to stretch our pantry with our garden and about $100 at the store for 3 months!!! Now she just shakes her rad and asks where I plan to put it all 🙂
I would add just a few things though, if you use creamer in your coffee add a few bottles of the powdered version, some dried fruits or a couple large bags of trail mix, pie fillings in a few fruit varieties (awesome in oats!), crackers are great for kids who won’t eat a tuna, spam or other canned meat sandwich but they may be willing to eat “lunchables” DIY of course!, and other all in one items like spaghetti O’s, canned stew, canned ravioli, and ramen. It may not be the healthiest solutions but if you need these items you will be exceptionally grateful you have them!
My mylar bags and oxygen absorbers just arrived. I’m very excited to begin this new angle on prepping, as my previous efforts have been canning, buying canned foods, and stocking up on other essentials such as personal items.
If I’m not mistaken, one of the suggestions for storing already packaged food, such as pasta, said it is okay to put a little hole in each package, add the absorber, seal it to the corner, suck the air out, and finish sealing. Is this right?
You can’t go wrong with instant mashed potatoes, they are a great and inexpensive addition to your food storage. I like Gaye, will use the DAK ham, it is one step up from SPAM. You can add it to a pot of bean soup or fry it up with some potatoes and onions and peppers. I look for versitile foods that are low in sodium and that serve multiple purposes.
Gaye, I have worked for Green Giant for many years. It is their harvest season now. They have giant warehouses to in which to store their can goods for the next year. They have to get rid of last years cans, to make room for this year’s cans. Have you noticed that in the fall of the year, can fruits and vegetables go on sale. I’m not telling you to not buy them, but keep in mind that most of them are last years crops, and as such, are one year old when you buy them.
Wow Gaye. I read all comments, and I see one from “Katzcradul”, so we know you have a very important web site. (I already knew this) I saw one reader loves cheese and crackers when times get rough. Katxcradul has taught me to “wax cheese” for long term storage, and many, many canning techniques. Everyone should subscribe to Katzcradul’s U-tube videos.
OK, Enough sucking up for today.
I would like to add something, not necessarily to the list, but more like “food for thought” ideas that could very well save you and your family’s life. Living in the South, you “will almost” grow up around some natural disasters, whether it be a hurricane or tornado, most of us here take “prepping” very serious..and we learn a lot from those disasters also (I.e. Hurricane Katrina). I grew up around great-grandparents, grandparents, parents, other relatives and friends, who have a garden, almost for the entire year. Learning to can and freeze food was as natural as brushing your teeth! During the summer, when school is out, we shelled peas, shuck corn(yeah say that fast!), canned beans and tomatoes, picked berries, smashed berries, and, on occasion, churned butter! I wish I had a dollar for every pea I shelled! I be richer than Midas! Knowing these “techniques” can make a huge difference in feeding your family for several months without electricity. There have been lots of times when we would get lunch or diner straight out of the garden, washed and prepped, cooked, and on the plate in a couple of hours. No storage. No refrigeration! Scraps of food went into the garden or compost. And you can cook this stuff straight over an open fire. Two words…”cast iron”…it is a very good investment…it is great to use anywhere…open fire or stove! You don’t have to wash cast iron(I know it does sound gross, but believe it or not, that is the “beauty” of cast iron)..you wipe it out and keep it seasoned. You can cook anything in cast iron, from biscuits…to a cake! People with cast iron can cook almost forever! I would view it as essential. Enough about the garden.
I still hand wash clothes and hang them out to dry..yes, I do have a washer and dryer, but sometimes I just like sun dry clothes. You can set up a clothes line between two trees, in less of an hour. At the lake, we dry clothes over pallets. By the way, speaking of pallets…they are free and you can use them to start up a fire pit or fire place. Get you some. Pallets are good for LOTS of things. Keep that in mind.
We are fortunate to live around hunters and people who do “a lot” of fishing. Almost all of my relatives, friends and neighbors hunt! Write down in your disaster plan the names of people you know personally who hunt and fish. You may very well have to depend on the for some food, eventually. Make friends with people who garden too!
Last thought. I live in a small subdivision, in a small southern town, and a lot of the stuff I mentioned, are very natural to us, because we grew up around it. I can’t even remember the last time I bought a tomato at the grocery store! Our small community established our own disaster plan in an effort that if there was a great catastrophe or crisis, we can block off our subdivision and go straight into “survival mode”…it is not that hard to do, and remember there is always safety in numbers.
You just never know what tomorrow will bring, but don’t wait until the time of a crisis to practice some of these skills. Learn to garden, because fresh food is healthier…make it a natural part of your life. Two tomatoe plants can produce a lot of tomatoes! Learn to fish..for fun with the family! Make a mental note of the people around you (or coworkers) who hunt. Learn to milk a cow(I am not kidding). Learn to sew or knit. Learn to cook over an open fire pit…make sure you build a fire pit! These are little things you can do now…without a computer. Hold practice runs with your community with disaster plans. A manual is not going to help you. What you know on a regular basis, will. What good is 20 lbs of rice going to do without knowing how to cook it without a stove or electricity???! It’s not! And for heavens sake, take a first aid class, and invest in a very good first aid kit. That is something you should do anyway.
First thing first…in any event or emergency, the first thing you absolutely need to do is establish your water supply first! You can do without food for a few days, but you cannot survive without water! Familarize yourself with small creeks, streams, or small lakes near your home or work!
When Kafrina hit a few years ago, it was unbelievable to see the number of people who decided to ride out the storm instead of evacuating. As the “reliality” of the destruction of Katrina was sinking in on TV, what was so horrifying was watching all these “hundreds” of people without water! And nowhere to get it! They were completely cut off from civilization! As the next couple of days passed on, and still, no relief in sight, I watched in horror the actions do these people desperate for water! I wanted so badly to reach through my TV and hand them a bottle of water, but could not do that! I never felt so helpless in my entire life. And they were killing each over in an effort to get to water! With all the technology, with all the electricity, with all of our knowledge, we could not get a bottle of water to these people, and some died on the side of the road in desperation to get to water! I have never forgot how quick a people can destroy theirselves over they lack of water, and also for their lack of taking other precautions to keep themselves alive!
Enough said…get some water!
Susan – Thank you so much for taking the time to share your thoughts. I can write and write and write but at the end of the day, it is the real time experience of my readers that give me the most inspiration.
Backdoor Survival gets lot of preparedness newbies – I will share this with them in a separate article if that is okay.
— Gaye