This site contains affiliate links. As an Amazon Associate, I earn a commission from qualifying purchases at no extra cost to you. Full Disclosure Here.
Charcoal making is a simple process, however during each step there are protocols to be followed or that beautiful charcoal will either burn down to ashes or it will be “undercooked” and the impurities will remain. The result of your labor is not anything like the briquettes you pick up at the hardware store for a summer barbeque.
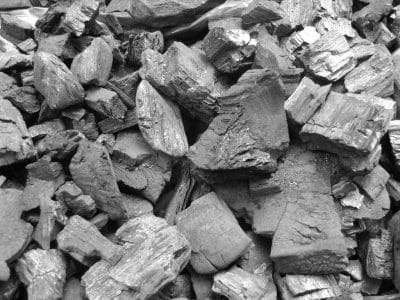
The idea is to cook this wood in a low oxygen atmosphere at a high temperature. This then releases the water, methane and hydrogen. After the cooking is done you’ll be left with a substance that is almost pure carbon and the weight is significantly less than the weight of the wood you started with. The resulting charcoal will be about 75% lighter but more pure and energy efficient.
The store bought briquettes are made from compressed sawdust so you can see how much longer lasting and energy packed lump charcoal made from real hardwood would be. You can sometimes purchase real hardwood lump charcoal in the stores but it is very expensive compared to making it yourself.
I checked out the price of Royal Oak 100% All Natural Hardwood Lump Charcoal and it’s 4 pounds! I have seen the Cowboy Brand for less, at about a buck or two per pound but even so, learning to make real 100% hardwood lump charcoal for yourself is a good skill to acquire.

You can see that the do it yourself method is cost effective, especially if you need to have an adequate amount on hand for a quick, energy packed, slower burning, higher heat fuel source. Consider that you may need it on an ongoing basis and if it becomes unavailable commercially you still have the skill and know-how to produce your own high quality, clean, lump charcoal.
In this article, I will choose just one of several methods of making lump charcoal. You may have used a different method. If that is the case I hope you’ll share your most successful technique in the comments.
Let’s get started.
Also Read: Survival Tips
Materials you will need:
- 55 gallon metal drum (Oven) – that has not been used to hold anything toxic…no oil products either. It’s best unpainted) An old drum will do perfectly well. You need not purchase one. Scavenge one out. No lid is needed. An old trash burning drum will do the job.
- 5 gallon new steel paint bucket with metal clench tabs on the lid. This becomes the crucible. If you don’t have one at home they can be purchased at Lowe’s, Ace or any large hardware store. Try to find an unpainted bucket.
- About 35 pieces of regular dry firewood to keep the “oven” going.
- Dry firewood. Use hardwoods like oak, maple, hickory, apple etc. but stay away from walnut since it has some highly allergic properties and can make people sick if breathing the smoke. Cut wood about 2-4” in diameter and into uniform lengths with the bark removed. This is what turns into charcoal. If you have access to a lumberyard where they toss out the lumber ends, that’s a good resource. I once had an unlimited source at a boat building shop. The more I hauled off in our pick-up truck the less they had to get rid of. You’ll need enough pieces of this wood to completely fill the 5 gallon steel can. Don’t use chemically treated wood.
- A good pair of long leather wood stove or welding gloves, as a safety measure.
Step One
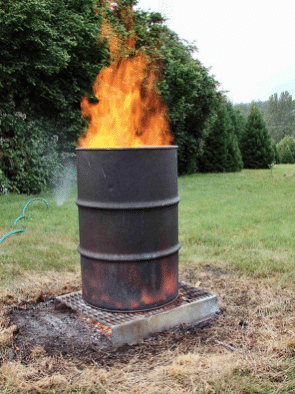
Convert your 55 gallon metal drum to a charcoal oven by making air vents on the bottom fourth. Punch ½” to ¾ “holes at random about 12-14” apart all the way around. This allows air to enter…. this being one of the three components needed for fire. (Air, fuel and ignition source).
The barrel pictured below already has a fire going but for our purposes we start with a cool drum and then build a fire later.
Step Two
You’ll want to prepare the 5 gallon steel bucket or paint can with the tab clasps lid. See below. This becomes your crucible which is a metal container in which substances may be subjected to very high temperatures. In this case, about 500°.

This 5 gallon bucket needs only one large 5/8 “ hole drilled in the center of the lid. In this crucible carefully layer the 2-4” diameter debarked hardwood you have prepared and cut to size. Or add the solid hardwood scrap pieces mentioned earlier.
You need to pack it in tightly, usually in an upright position, allowing maximum fill capacity, leaving little or no airspace at the top. The idea is to pack the wood as tightly as possible to decrease the airspace and minimize the chance of combustion inside the crucible.
If combustion occurs the wood will burn to ashes and you won’t have the lump charcoal you set out to create. After packing the wood inside, place the tab lid with the hole drilled in the lid on the top and tightly clasp the tabs down, sealing as much as possible so no air enters. The top hole will be for the escape of moisture.
Here I must say that some people just place their crucible upside down on the bottom of the 55 gallon drum. This may work but there is more chance of getting burned or for air to enter the crucible. It’s up to you what method you use.
Step Three
Build the fire with untreated wood. First place the crucible on the bottom of the larger drum, lid side up. Start with a small fire in the drum on one side of the crucible and add firewood slowly making sure the fire is hot.
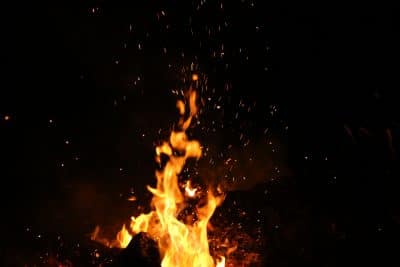
Then as you add fuel allow the fire to move so it is around the whole crucible. Add more fuel as needed, and as the fire spreads over the top of the crucible add even more wood. Sometimes adding smaller pieces of wood cause the fie to burn hotter.
The fire should surround the crucible on all sides and top. Make sure you can always see the hole in the crucible lid and that it is not blocked. As I said, this is where the moisture from the soon-to-be lump charcoal escapes.
You MUST keep the fire hot. The inside temperature of the crucible needs to be about 500° so the hot fire needs to be surrounding all sides and the top of the inner container.
Step Four
In about 30-45 minutes, you will begin to see white steam coming from the hole in the crucible. If it remains white you are good but if it turns darker gray then the wood for char may be burning, but this is not usual. The white steam is only the last of the moisture leaving the wood. Keep watching the hole and as the charcoal is almost ready.
A small flame can be seem coming from the hole in the crucible lid. Pay close attention and as the flame. When it goes out, carefully remove the crucible from the 55 gallon drum, using either long leather woodstove gloves and/or a pair of strong tongs.
Cover the hole with a damp rag immediately. This will keep the charcoal inside the crucible from using air and bursting into flame. Let it all sit and cool, still covered with the very damp rag, overnight. Keep it outside away from your house or any outbuildings. By the morning, it should be completely cool and ready to open.
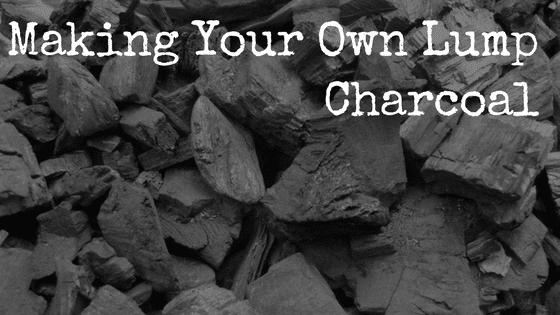
If you have done it right, you’ll have a nice lump charcoal product that will make anything you cook on the grill taste better than if you’d used the chemical treated, lighter-fluid after taste laced briquettes. Lump burns hotter but not as long. As you can see below, it actually looks like charred wood.
Step Five
You can store the completely cold lumps in a heavy plastic lidded bucket or in a strong paper leaf bag.

Final Thoughts
As I mentioned in the beginning, there are many ways to make lump charcoal and this is just one of them. If you have made lump charcoal using a different method I’d like to hear your tips, tricks and processes in the comments. Always looking to improve!
Here are a few more uses to consider.
- Any char dust at the bottom of the crucible can be used as biochar in your compost.
- Some black powder gun enthusiasts use lump charcoal in making their own black powder.
- Unlike briquettes, this lump charcoal can get wet and not fall apart. After it dries, use it as normal. I have found that briquettes also breakdown over time.
- Lights faster and no lighter fluid is needed to start them.
- Burns hotter
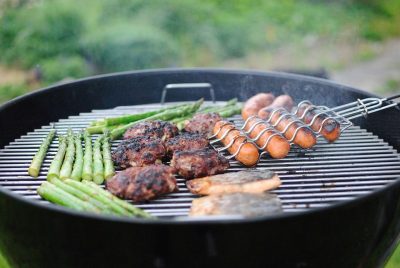
- Used by competitive grillers for an excellent tasting grilled food with no chemical aftertaste.
- If there is a run on briquettes at the grocery or hardware or the stores are closed down, you now have the knowledge to try your hand at turning wood into charcoal to use as an alternative fuel for cooking your emergency food.
Author Bio: Donna’s childhood was in a time when it was safe for Mom’s to say, “Just be home by dinnertime” and children were free to roam woods and fields all day. Helping neighbors, family meals, using your imagination, honesty, politeness, and doing chores was a way of life. She went on to become an R.N. working in a busy hospital and then later doing medical research. Donna and her husband home educated their children for 23 years. She has regularly taught self-reliance workshops for the past 25 years. She leads weed walks, forages food and medicinal plants, is an avid canner of about 1000 jars a year. She’s a cub master, enjoys being a genealogy indexing arbitrator, is an amateur radio operator as part of emergency preparedness and has fun watching the quirkiness of her laying hens. She is Grammy to (in her humble opinion) the two most fabulous kids in the world. Faith and family are first priority.
If you enjoyed this article, consider following our Facebook page.


![Best Survival Food Brands & Companies for Your Emergency Ultimate Pantry [2021 Update]](https://www.backdoorsurvival.com/wp-content/uploads/2017/06/TopFive_SE_1200x628_v2-70x70.png)


9 Responses to “Making Your Own Lump Charcoal”
A little history lesson for you’all. Henry Ford who made the Ford car assembly line was both a little tight with his money and he was very inventive was walking along the line one day and saw lots of wood pieces being thrown away. Seeing the waste he put his mind to how it could be used. He had his workers collect all the wood and he had it taken to the next town. There he started to make charcoal bricketts. He named his product after the towns name…..Kingsford. And history was made.
Where I live we are not allowed to have any type of open fires unless it has screening to keep the amburs from getting out I would like to know if I could use a old smoking grill to make the lump charcoal
Excellent post. It’s really a nice and helpful piece of info.This is the perfect blog for anyone who wants to know about how to make your own lump charcoal. Thanks for sharing this information with us.
Sorry for the late response. Lump charcoal is the first part in the process for making black powder. Some “hard core” Civil War re-enactors that we know use lump charcoal in this way. It is a skilled process that I know only a little about but having lump charcoal on hand could be used as a barter item for the purpose of black powder production.
I don’t know the answer to the two previous comments.
But I have read that in the past in England, the great manor houses always had charcoal making operations in their forests far away from the house. They would have a steady supply of charcoal, and there were workers whose sole job was to produce charcoal.
Oh, it did dawn on me that there are useful medicinal uses for pure, real charcoal and water filtration uses.
We have a homestead with woodlot but still use store bought charcoal for outside cooking. Wood is not really always practical for cooking. Charcoal is quicker and less work.
Interesting article! I gather that one of the big benefits to having charcoal is that, because it is so efficient at heating, you can store enough charcoal to (for example) cook one hot meal a day for a year in a LOT less space than it would take to store enough firewood to cook that many meals. Plus, if you had to bug out, it would be far easier to take a few buckets full of charcoal with you than a truck-bed full of firewood, since charcoal is so light. It’s great to know that there’s a way to make DIY hardwood charcoal that will be more effective than the standard briquets and a lot less expensive than commercially produced hardwood charcoal 🙂
Personally, this is way too much work when I can get a 20# bag of Mesquite Lump Charcoal for less than $10.00. Even if I couldn’t, I think it’s more economical to just burn the wood to cooking coals and shovel it in the pit. Here, you are burning twice the wood for half the coals.
I was wondering about the same thing. What is the benefit when you can take the wood and produce your own coal bed from the wood as it breaks down? I am sure there is a benefit, or this would not be an article about it, but I need help seeing the why.