

This site contains affiliate links. As an Amazon Associate, I earn a commission from qualifying purchases at no extra cost to you. Full Disclosure Here.
For those of us that have either had to give up wheat products by choice or by necessity, it can be hard to find tasty bread. When we buy gluten-free bread in the store, the selection is very limited, and the loaves are small and expensive on top of being frozen. I often wonder how long the loaves have been baked and set in a freezer before we buy them?
The other day Matt pointed out to me that you can buy a lot of disposable aluminum pans for a very low cost. I explored and found 120 2lb loaf bread pans for $25 and a pack of thick bread bags and ties for another $10. The way I saw it was that we might be able to save a lot and have bread in our own freezer for whenever we want it.
Baking our own bread also gives us some control over the quality of the ingredients. For far less than the cost of store bread, you can have a better loaf.

Basic Gluten-Free Sandwich Bread
To make up to 4 loaves
1- 44 oz pkg Bob’s Red Mill 1-1 Gluten Free Baking Flour
5 eggs or the equivalent of egg replacer
1/2 cup + 1 tbsp oil
3 3/4 cup water
1/8 cup yeast or around 6 tsp
8 1/2 tsp of Xantham Gum
2/3 cup buttermilk powder or 1 cup nonfat
3/4 cup brown sugar
3-5 tsp salt
To make up to 8 loaves
2 44 oz pkgs Bob’s Red Mill 1-1 Gluten Free Baking Flour
10 eggs or the equivalent of egg replacer
1 1/4 cup oil
7 1/2 cups water
11 1/4 tsp yeast or 1/4 cup
17 1/2 tsp Xanthan Gum or 1/3 cup
1 1/4 cup buttermilk powder or 2 cups non-fat milk powder
1 1/4 cup brown sugar
6-10 tsp salt
Put all wet ingredients in a large bowl and whisk together with the yeast. Combine dry ingredients in another large bowl and mix well. Make well in the dry ingredients and slowly add the wet, mixing as you do this until everything is combined. If the dough is too dry then add some more water but do it slowly, so you don’t get the dough too sticky. You want something that is similar to very thick cake batter that can be smoothed into a pan. Mix by hand for 2-3 minutes until all lumps are gone. If you use a stand mixer just let it mix for 5 minutes. Longer mixing times seem to help with the fluffiness of the finished product but don’t mix longer than 7-8 minutes in a stand mixer.
Pour into lightly oiled pans and put in a warm place to rise for 1 hour. It may take up to 1.5 hours if it is not very warm in your house.
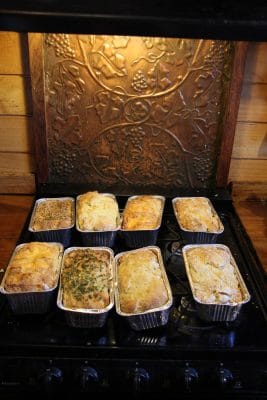
To bake, preheat oven to 350 F. Bake loaves for an hour or more. The type of pan you use makes the cooking time vary. I have a tendency to pull the bread out too soon. You want to get the bottom nicely browned and reduce the moisture that can be a problem with gluten-free bread. Stick a toothpick in after the top looks browned and see if it comes back clean. I try to peek down in the pan sides. Ovens can vary a bit as well. I am not trying to be vague, but I want you to know that part of the trick at successful baking is figuring out how your oven and pans perform.
The recipe says to cool and slice before freezing, but I don’t see any reason why you cannot freeze whole after cooling and slice after defrosting. You definitely need to allow the loaf to cool entirely before freezing though regardless of if you want to slice it or not.
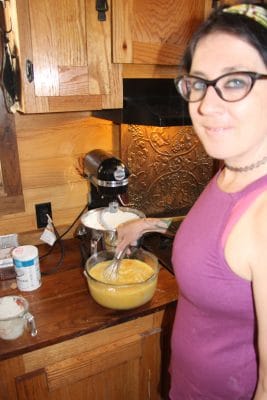
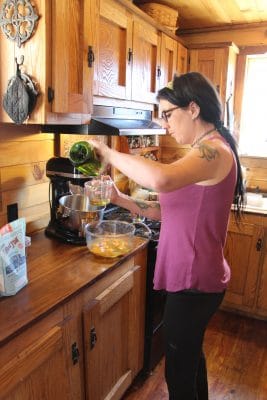
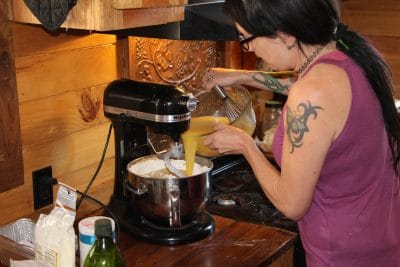
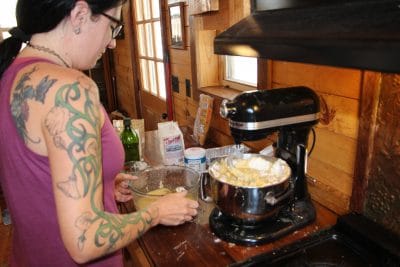
The pictures above show me overfilling my mixer and making this whole project a lot messier. This was a bit of an experiment to see just how much my mixer could handle. I tried to make 8 loaves at once, and that was just nuts. I have halved the recipe so that you can avoid what I did. I am still learning what this mixer is capable of since buying it last summer. If you are kneading by hand then, by all means, go for the big recipe and freeze a lot of bread!
Variations
The recipe in this post can be changed some. For example, if you wanted to add some seeds or spices, that shouldn’t be a problem. To make cheese bread, you could substitute cheese powder for the dried milk.
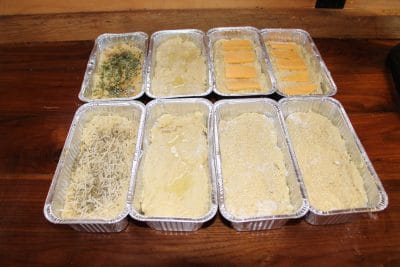
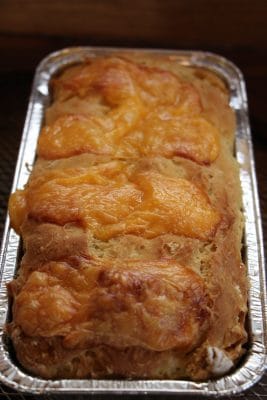
We made a few different loaves. Sliced cheese was placed on two loaves, chives and vegetable powder with oil on another two loaves. The rest were plain, Italian Herbs and Parmesan, and Sesame seed. The beauty of baking your own is that you can customize your recipe and have better bread than what a lot of gluten-free store bread offers. I have not had the pleasure of going to a bakery and ordering anything gluten free before.
If I were able to buy these loaves in town they would cost around $7 each, so each batch made is about $56 worth of bread. I would also say that the ingredients I used are better than what a lot of bakeries are using.
I might have spent around $15 to make all of this. It is hard to estimate exactly because we get eggs from our chickens and I shop sales to stock up on gluten-free baking supplies. You can use egg replacer, and that can reduce your cost if you are buying good eggs at the store.
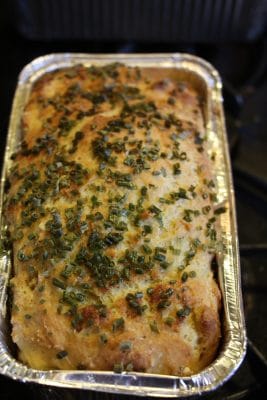
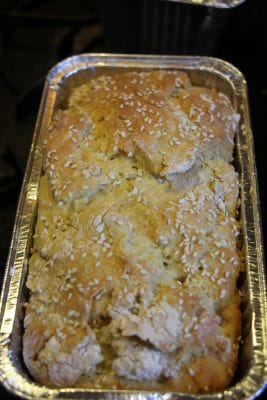
Cheese, chives, and sesame seed loaves. It has been a long time since I was able to eat anything like that because gluten-free bread is very limited unless you live close to a hip bakery and pay a lot.
I originally thought about freezing the bread in the pan placed in a bread bag, but I decided to slice and bag. This experience also led me to the realization that I need to buy supplies to make breadmaking easier and get better results. Here is what I learned I was missing or what I would change.
- Very smooth spatula for smoothing out the top of the bread
- Bread pans that are not disposable
I like the idea of bread pans that you can just give away or take to gatherings and not worry about. For baking, at home, though I think I will upgrade to 8 affordable metal loaf pans that stack inside of one another. It makes no sense to use the disposables as far as long term costs go. I might use a few for bread, but I will likely repurpose them for portioning out meals when we cook so I can send them down to my Dad so he can have something homecooked.

Purchase the following ingredients before you even try to bake anything gluten-free that is not pre-mixed
- Xanthum Gum
- Gluten-free flour blend
- Tapioca flour
- At least 1 8 oz package of bread yeast. I recommend buying several pounds of bread yeast to have on hand for a long emergency even if you don’t bake a lot.
- Extra salt
- Oil and butter
- Eggs and/or egg replacer
- Powdered milk. If you cannot have any dairy, then use coconut milk powder or rice milk powder
- Extra Saran Wrap
- Smooth spatula
- Large mixing bowl for kneading bread
- A large bread knife or two
There will be other things to get later, but the items above will help you get started and ensure you can make some basic bread, cookies, pastries, and pizza crusts. For some baking, you will benefit from specialty bread pans since it can be difficult to get gluten-free hamburger or hot dog buns to hold their shape while baking.
Tips for learning to bake gluten-free
- Start slowly with basic recipes. Bob’s Red Mill and other flour producers have a ton of delicious and easy recipes
- Follow all the steps and don’t take short cuts
- Allow extra time for bread to rise on colder days or heat your oven to 200 F turn off oven, place bread in the oven, and let the bread rise. I do this on colder winter days, and it helps the house stay a little warmer
- Avoid overloading pizzas and making them too large. A gluten-free pizza should not be more than 12″ in diameter. It is too hard to get the crust well cooked and not soggy when they are larger than that. Also, be sure to bake your pizza crust for 5-10 minutes before adding toppings to help avoid sogginess
- Never try a recipe the first time when you are cooking for a crowd or if you do, have a backup plan in case it doesn’t work out. It can take a time or two before you get a recipe down enough to do for a lot of people
Do you have any gluten-free baking tips to add? What recipes do you like the most? Please share in the comments below!
Samantha Biggers can be reached at [email protected].


14 Responses to “Gluten Free Bread On A Budget The Fast and Easy Way + Tips For Beginning Gluten-Free Bakers!”
Thank you for including gluten free ! Two things which came to mind about the aluminum pans. First, if you bake alot of bread, GF or not, the cost of these pans to replace them starts to add up. Second, the aluminum in these pans gets into whatever you are using them for when they are heated. Same goes for any aluminum product used for cooking or baking, including aluminum foil. Not only does this increase the heavy metal toxins already in your body, some people actually are allergic to aluminum and can have severe medical issues as a result. Better to use glass or cast iron for breads. And for general cooking, I would also add stainless steel. Too expensive? Look for sales and yard sales. Its worth your health.
Aluminum is not a heavy metal. In fact it’s classified as a light metal. Makes it sound scarier if you call it a heavy metal though.
I look forward to trying this recipe. The last GF sandwich bread recipe I tried came out way too dense and fell flat. I don’t have celiac but after a lot trial error and seeing specialists, I discovered gluten is a huge culprit to my acid reflux and IBS.
I have been having trouble printing this recipe. Any thoughts? Thanks
Is yeast in the bread ok to have when gluten free? I’m just starting to go gluten free I have celiac diease thanks.
I am not aware of yeast causing any issues. There are yeasts that claim to work better for gluten free baking but I just use regular old bread yeast. I am sensitive to wheat but I do not have celiac. Thanks for reading!
Do you know if there is a way to make the bread without the milk powder or is there a non dairy substitute I could use in it? Thanks for the recipe. I have to use gluten free and non dairy also. Any help is appreciated.
If you have someone with a nut allergy, don’t use Bobs Red Mill. They process with nuts. Until that changes, I will avoid all Bobs Red Mill Products.
The problem is that gluten free is not necessarily healthy unless you celiac disease or gluten sensitivity.
“Following a gluten-free diet in the absence of celiac disease may be
detrimental to health. Nutritional deficiencies: Avoiding foods that
contain gluten can lead to deficiencies in essential nutrients,
including iron, calcium, fiber, folate, thiamin, riboflavin, and
niacin.
Feb 19, 2018”
This came from Medical News Today.
Here’s another quote from Gluten Intolerance Group:
“The gluten-free diet is healthier for people with gluten-related
disorders (celiac disease or gluten sensitivity), but there is no
evidence that it is beneficial for people who do not have these
conditions.”
People think they’re doing themselves a favor by cutting out glutens, when the exact opposite is true.
I would strongly recommend buying good pans, in aluminum for the weight and ease of use. I’ve made bread most of my life and the ones I love the most are by Fat Daddio (gotta love that name). They make a loaf that is straight sided, not slope sided or triangular like most pans used by home bakers. The loaves look like the ones you buy at the store. The pans come in many sizes, too. I’ve been looking at gluten free bread making as one of my sisters has developed an intolerance for it. Thanks for your advice and the recipe!
Samantha, I have several solar ovens (round cylinder like GoSun) and was wondering if you or any of your readers have tried baking bread using a solar oven like mine. Thanks for the article!
Are you still sending out daily emails?