
This site contains affiliate links. As an Amazon Associate, I earn a commission from qualifying purchases at no extra cost to you. Full Disclosure Here.
Whether or not you currently have a food garden, practical wisdom says you should stash away some heirloom seeds for the long term.
If the time ever came when food was in short supply or overly expensive, your stored seeds could become a lifeline. Stored seeds could be used in your own garden, in a community garden, or even as tender in a barter situation.
This raises the question: what is the best way to store seeds for the long term? This question is especially timely for me since I have a number of new, unused seed packets that need to be packed away somewhere besides my desk drawer.

Today I have gathered a few options for you. In addition, I am giving you the option to create your own heirloom seed bank using seeds from the Survival Seed Vault.
Also Read: Food Storage Ideas for Preppers
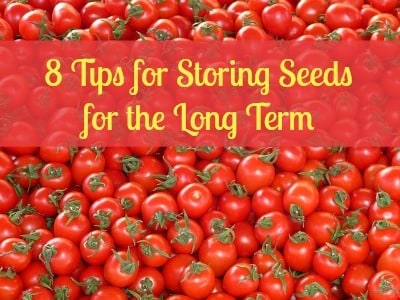
Storing Seeds for the Long Term
During my own research, I learned that storing seeds is not unlike storing food. The enemies of seeds are similar: heat, light, and humidity. Some sources also indicate that oxygen is a problem with seed storage.
Here are some tips for storing your seeds:
1. Keep seeds at a cool to cold temperature of 40 degrees or less.
2. Avoid fluctuations in temperature such as a garage or storeroom that is cold in winter but blazing hot in summer.
3. Avoid light and never store seeds in direct sunlight or a well-lit room.
4. Keep your seeds in moisture-proof containers. A Mylar bag or mason jar is perfect as is a food saver bag. Even a standard Ziploc bag will work if you take care to squeeze out all of the air first. If you are unsure of the moisture level, check your bag after a day of storage and see how your seeds look. Better to be safe than ruining all your leftover seeds for planting next year.
5. Storing your seeds with a desiccant (silica gel) or oxygen absorber may prolong their life.
6. As with your food stores, rotate seeds every few years. This is not 100% necessary but if you are gardening anyway, why not rotate?
7. When you are ready to use your seeds, keep them in their closed storage container until the seeds come to room temperature. This will prevent unwanted condensation from settling on the seed packets.
8. To store your own saved seeds, spread them out, and allow them to air dry. Once you are done drying seeds, put them in envelopes or even repurposed medicine bottles, and label them. You can then store them in your refrigerator or freezer just like store-bought seeds.
The Germination Test
Something that you may want to do before planting saved seeds is perform a germination test. This will help you determine how viable they are. So, for example, if you determine that they are 60% viable, you can start 40% more than you would normally start to come up with the requisite number of plants.
A common method to test the germination rate is to take a paper towel and dampen it nearly to soaking. Count out 10 seeds, place them on the paper towel, then carefully fold it to fit into a plastic bag. Place your bundle in a warm spot on your kitchen counter, making sure that the bag remains open slightly to allow a little air to enter it.
Check frequently and when the seeds have sprouted, determine the germination rate. Hint: 8 seeds out of 10 is 80%.
A Word About Seeds
For years, seeds have been scientifically manipulated in such a way that they could not be successfully saved and remain true to form. This was good for the seed companies but bad for people.
Thankfully, there are a number of sources where you can obtain non-GMO seeds (not genetically modified) and non-hybrid seeds. These non-GMO, non-hybrid seeds are the ones you are going to want to save for your DIY survival vegetable seed bank.
Create Your Own DIY Survival Seed Bank
One of the best ways to accumulate seeds for the long term is to purchase a few packets of seeds monthly over time. You know how I like to do things One Month at a Time, right?
To help you get started, you can check out options like the Survival Seed Vault packages here.
Once a month, you are sent packets of seeds. These seeds are fresh and can be used in your garden now or saved for the long term.
I asked Mike a few questions:
1. Are the seeds you send out growing-zone specific? In other words, if someone lives in zone 8, they will be sent seeds that will grow in that particular zone?
Yes the seeds are zone specific with an occasional variety thrown in to stretch your gardening knowledge.
2. I see that the seed packets have a month printed on them. What does that mean?
The month in the upper right corner is the month the seeds are mailed. It has nothing to do with planting.
3. Are seeds available 12 months out of the year? If so, how does that work for climates that are buried in snow and ice during the winter months?
Yes the seeds are sent all 12 months out of the year. That does not necessarily mean you can plant them all 12 months. Simply store your seeds in a cool dry location and they will be good to go when gardening season rolls around. When you store your seeds properly they can easily last 5 or more years.
4. Is there anything else you would like to share with Backdoor Survival readers?
All seeds are heirloom varieties and non-GMO. In addition, we have an FAQ at //averagepersongardening.com/seedsclub/faq.php which answers the most popular questions that we receive.
The Final Word
Gardening is a valuable skill that every prepper worth his or her salt should learn. I know that I have had my own challenges in this area but I still try, even though I only do so on a modest basis.
Still, I make it a point to collect seed packets (check out this link to buy) and store them for the long term, properly sealed in my freezer. You should never know when they may become handy for food-growing or barter purposes.
Enjoy your next adventure through common sense and thoughtful preparation!
Gaye
Click Here To Vote For BDS at Top Prepper Websites! Did you know you can vote daily?
If you have not done so already, please be sure to like Facebook which is updated every time there is an awesome new article, news byte, or link to a free survival, prepping, or homesteading book on Amazon. You can also follow Backdoor Survival on Twitter, Pinterest, and Google+ and purchase my book, The Prepper’s Guide to Food Storage from Amazon.
Bargain Bin: Today I share some tools and supplies for using a FoodSaver to vacuum can your emergency food. And in case you missed it, read How to Use a FoodSaver for Vacuum Canning.
FoodSaver Vacuum Sealer: As long as the unit has an accessory port (and this one does), and inexpensive FoodSaver will work just as well as the fancier models. That is my two cents, at least.
FoodSaver Wide Mouth Jar Sealer: Already have a FoodSaver? If so, check out this jar sealer which can be used to vacuum seal your Mason jars. This is a great option for short to mid-term storage of items such as beans, rice, sugar, and salt. Store your jars in a cool, dark place, and you are set with the added advantage of removing a small amount for current use without having to disrupt your large Mylar bag or bucket of food. There is also a version for regular sized jars.
FoodSaver Accessory Hose: Most FoodSavers come packaged with an accessory hose. If yours is lost or damaged, be sure to purchase a host to use with your Jar Sealer.
100-Pack Oxygen Absorbers, 100cc: I always have these available. At less than 10 cents each, I consider adding a 100 cc oxygen absorber cheap insurance that ensures that my vacuum-sealed food will remain nice and fresh – even five years later.
Mylar bags & Oxygen Absorbers: What I love about Mylar bags and oxygen absorbers is they protect against every single one of the food storage enemies. Prices do vary but for the most part, they are inexpensive and easy to keep on hand. And while you can seal them up with a FoodSaver, some tubing, and a common clothes iron, I find it infinitely easier with a cheap hair straightening iron that you can pick up for very cheap.
Mylar Zip Seal Food Storage Bags: These are the zip seal bags that I used to package up my spices, herbs, and butter powder. These are extra heavy, 5 mil bags. I found that the zip feature made packaging extra easy although I still seal the bags with my hair iron.
Sharpie Permanent Markers: Sharpies were invented for preppers! And without question, Amazon is the cheapest place to buy them.
~~~~~
~~~~~


121 Responses to “How To Store Seeds for the Long Term”
I definatly would not use a desiccant in the same storage bag or container as seed, the purpose of dessicants are to absorb mouisture thus driing your seeds out!!!!
“Weeds” are going to grow in the garden and sometimes better than the intended plants one specifically grows. Let the “weeds” grow and, if you don’t already know which ones are edible or medicinal, find out which ones are edible and or medicinal and how to use and then let the good ones continue growing (purslane, plantain and more) . Every year plant your intended plants (flowers (marigold, day lilies, roses +), food and “weeds”) with the “Lazy And Have Pain / LAHP” gardener attitude in mind, as your body grows older it will be much appreciated! “What can I grow which is tall enough or easy enough to harvest or eat directly from the plant and also (1 or both of these 2): are the leaves food or tea (raspberry, serviceberry +) and/or is the bark or etc. medicinal or self seeding (garlic, onion the second season) or returns (mints, asparagus +)?” If one does this one will have lunch or “tea” every day for the entire growing season, with just air drying (or more if capable) and enjoy the garden in various forms all winter.
Plant marigolds by your tomato plants and plant shallots/onions on the south perimeter of the garden- helps keep bugs down. Though I now plant shallots/onions on the east and south perimeter. Also always start container gardens when you plant your big garden. I get my 1st lettuce and tomatoes from them.Don’t buy hanging basket flowers. buy your own hanging baskets, soil and flats of flowers. Plant those flowers yourself. After the 1st year, I spend less the 24.95 in total for 5 hanging baskets and my deck is just beautiful!
My mom for years planted marigolds around the outside of her garden she said it kept the rabbits out. I have to say it did seem to work.
My favorite gardening tip, and one that I’m hearing a lot this year is….just try it. No matter if you have no experience or years of experience, always be up to try something. There so many different ways to grow plants there is no one right way and by trying new things even if they are unfamiliar you are only gaining knowledge, even if it’s “well that didn’t work”. I say to everyone, just try to grow something, anything.
My gardening tip: We grow only heirloom varieties, each year I let a handful of each variety go to seed, then I collect the seed, spread each seed variety on paper towel to dry completely, then store the seeds. This way we have been able to build a seed bank of vegetables etc that grow well in our area and soil.
I rotate what I plant year to year
Save your own garden seeds!! Date, rotate, protect those seeds!!
compost, compost, compost, that is my favorite gardening tip, make your own its easy!
Because of the long time use of most gardening plots and farmland, the soil is depleted of minerals, using just commercial fertilizer , or for that matter your own compost pile will not replace the minerals, to help your garden produce a crop with a higher nutrient , mineral content, search for mineral supplments